.
Preinstalled-Openstack-VirtualBox-x64
A Pre-installed Openstack CentOS 7 x64 image that can be directly imported onto VirtualBox. You can literally setup and test Openstack in under 10 minutes. There's no need to install Openstack using this VirtualBox (.vbox/.vdi) image.
Preface:
I have spent hours setting up every solution out there to test Openstack. None of them are actually easy considering the heavy PC requirements and the time taken to build the Openstack modules from scratch. This solution would absolutely remove the hassle of installing Openstack, before being able to test it out. This solution does not require you to install any other application other than VirtualBox on your PC/Laptop. Openstack uses a lot of CPU and Memory resources. Please ensure that all your other applications have been saved/closed before running this VM.
This method uses a pre-installed packstack Openstack binary. These binaries are installed on an IP address: 10.0.2.15, which is the default NAT IP that VirtualBox assigns a new machine using a NAT Adapter.
Minimum Requirements:
- x64 compatible PC/Laptop that supports x64 compatible Virtual hosts
- Latest VirtualBox application installed on your PC/Laptop
- Atleast 4 GB Hard Drive space
- 6 GB RAM
- 4 CPU cores (Quad Core)
Note: You can always increase the RAM, Hard Disk space and the CPU Cores based on your Openstack requirements. Higher configuration is required for running Virtual instances within Openstack smoothly.
Download the Centos-openstack compressed VirtualBox Image from: https://drive.google.com/open?id=0Bw59oF2-DxdEU2hrb3AwN2RicFk
Installation Instructions:
Download and Extract the zip file onto "VirtualBox VMs" folder located under your Users/ folder in your PC.
Open VirtualBox application and import the contents of the zip file (Using Machine -> Add option). You should see the entry Centos-openstack in your VM after the import.
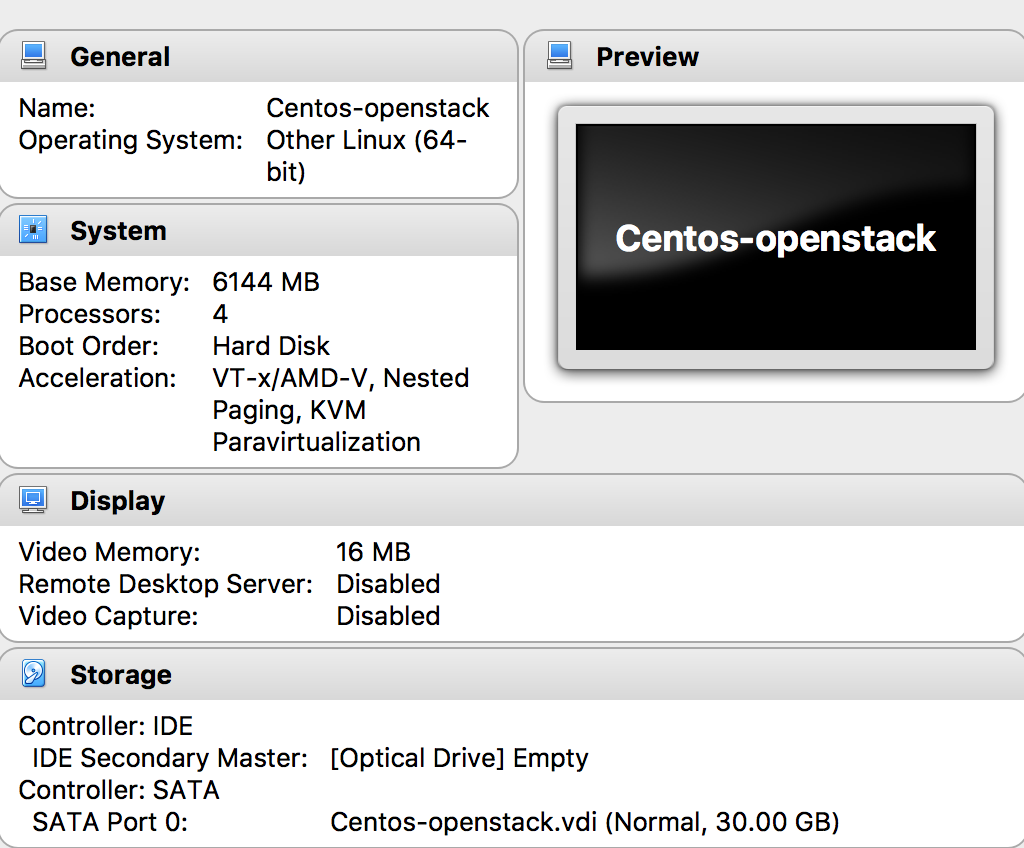
Quit all other applications running in your laptop/PC. Only then run this VM. The preset settings require you have a quad core x64 PC along with 6GB ram at least. Trust me, this isn't enough for Openstack still.
Ensure that the Centos-openstack -> Settings page does not have any invalid settings. Also ensure that the following configurations are properly in-place:
VM Settings:
a. Under Settings -> USB (turn off USB controller) if it shows up as invalid settings. Adjust your RAM to be at or below 80 % of your actual PC's Memory capacity.
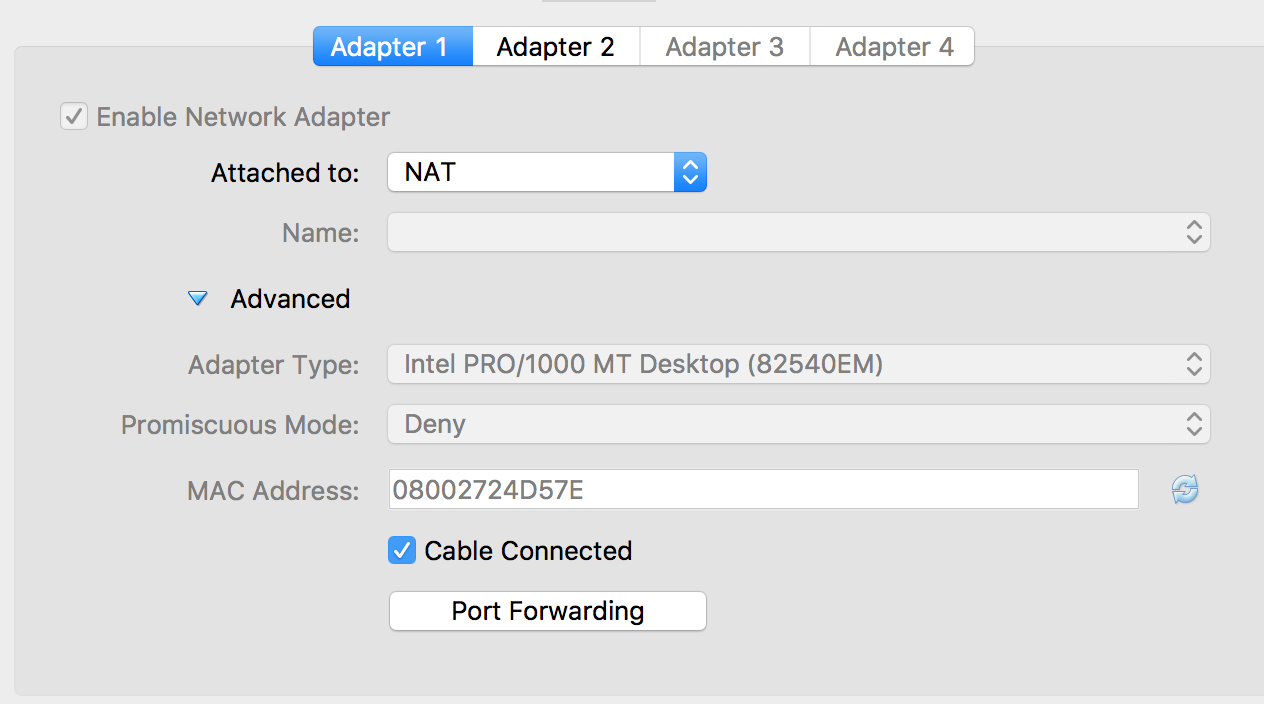
b. Under Centos-openstack -> Settings -> Network, Check if the NAT Adapter is enabled. Ensure that your PC/Laptop running the VirtualBox application has internet connectivity.
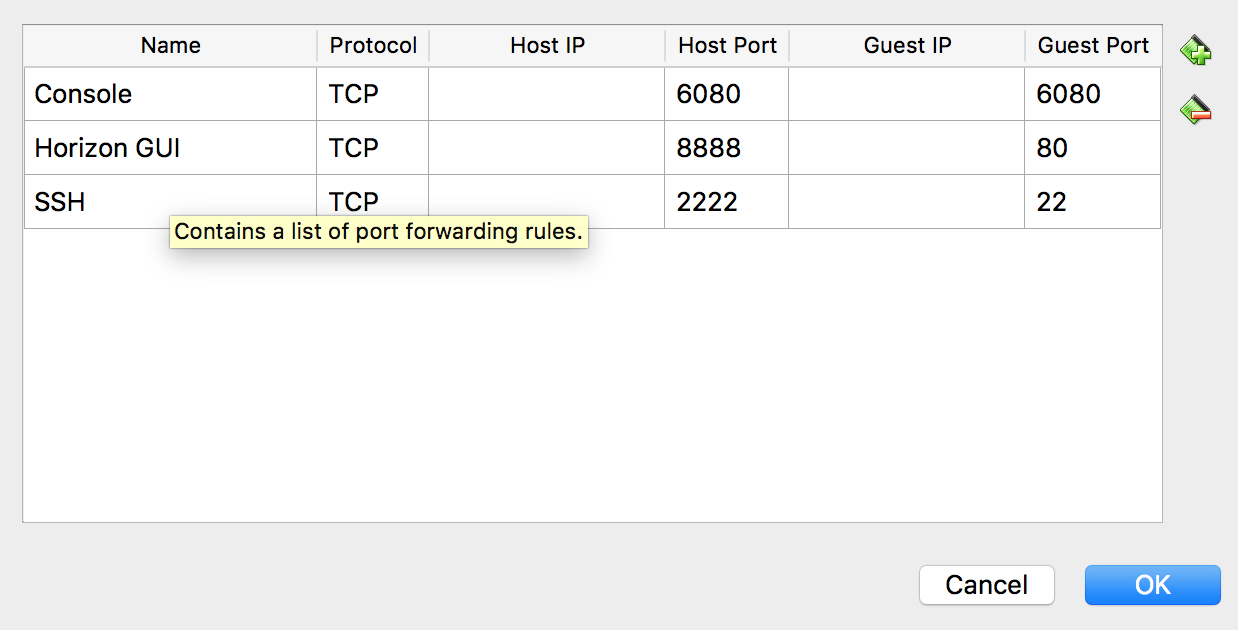
c.Under Centos-openstack -> Settings -> Network -> Adapter 1 (NAT), Click the "Port Forwarding" button and check if the following Port Forwarding options are in-place, else configure them.
d. Check the Settings page of your Centos-openstack VM. It should more-or-less be having the following settings:
Now start the VM. Let it load. Use the following PC credentials:
username: openstack
password: openstack
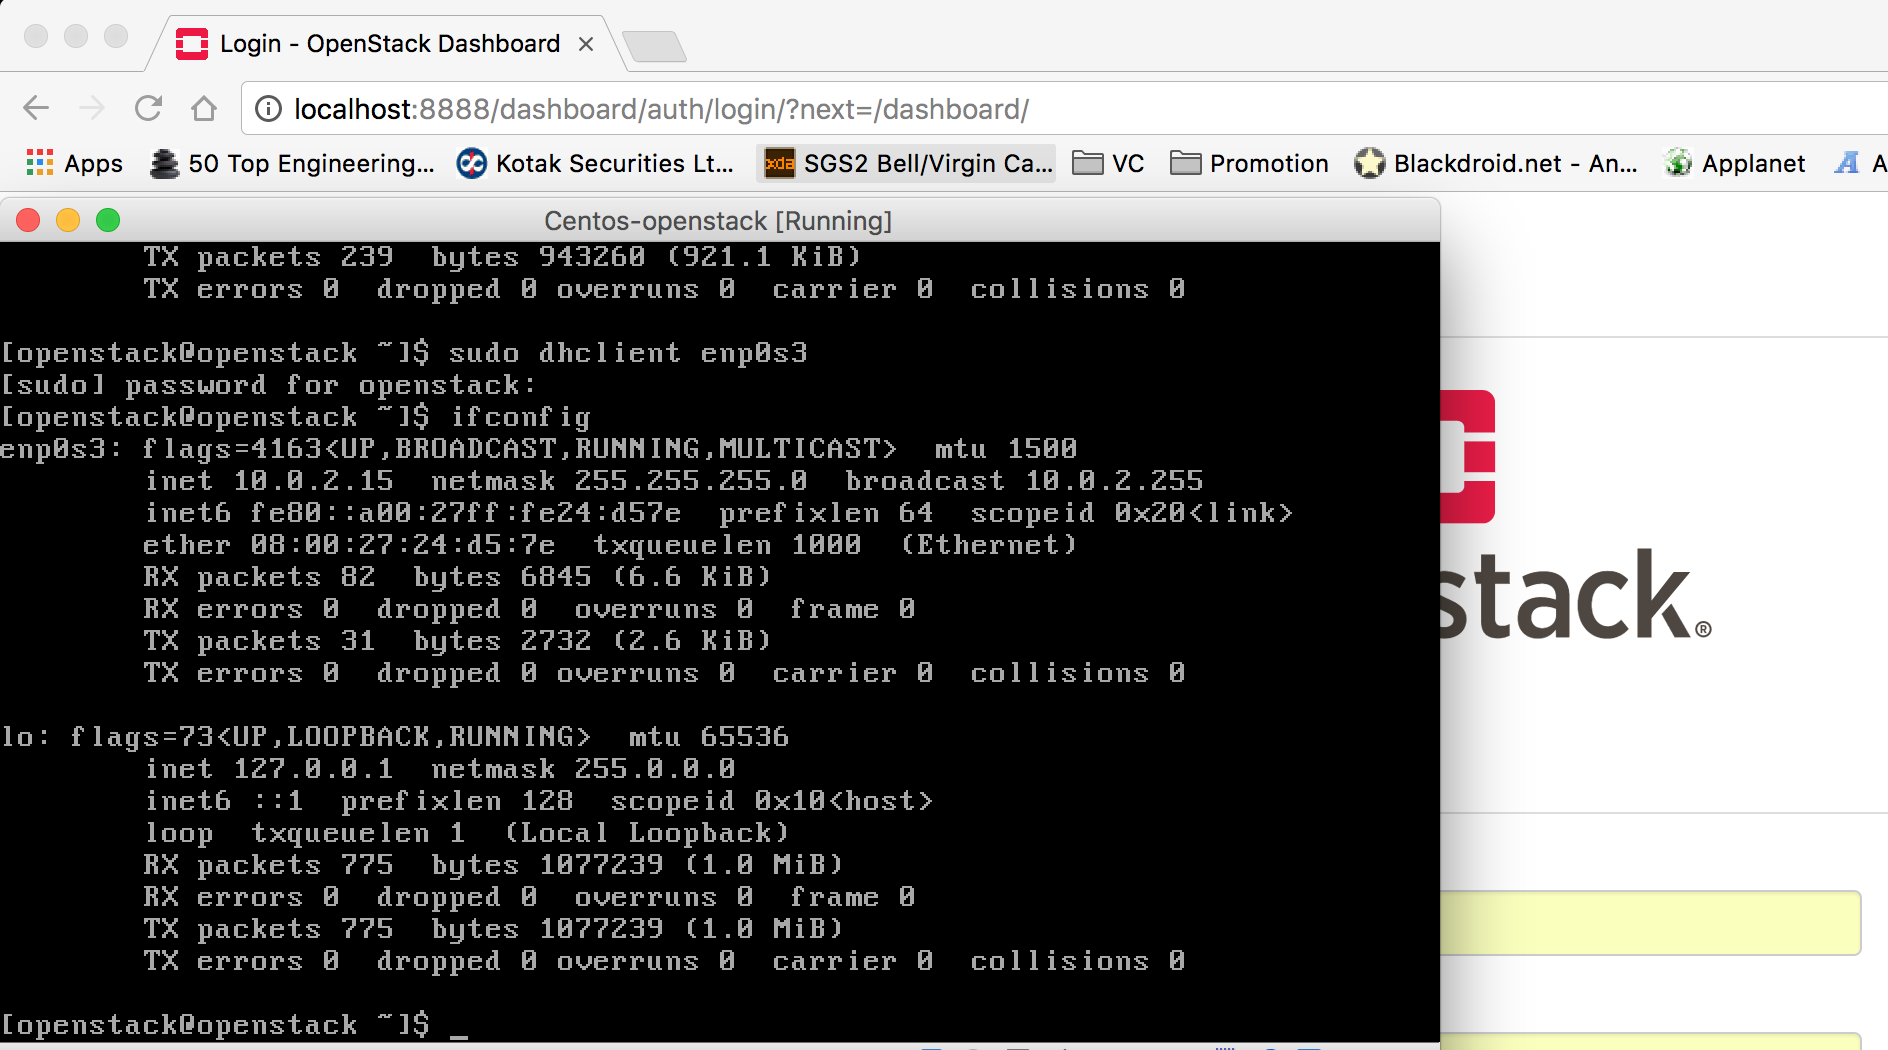
In the console, run the following command: sudo dhclient enp0s3
[openstack@openstack ~]$ sudo dhclient enp0s3
Provide the "openstack" password.
Now, check if you have obtained the 10.0.2.15 IP for enp0s3 interface using the command: ifconfig
[openstack@openstack ~]$ ifconfig
This may not work properly if you get any other IP than 10.0.2.15. From your PC/Laptop's browser you should access the following website: http://localhost:8888
Note: Openstack components may take 5 - 10 minutes to load once the VM has booted up and IP has been configured. Please wait a few minutes or refresh the browser's page if you do not see the Openstack horizon web interface as soon as you put them in your browser for the first time.
Openstack's horizon web dashboard should appear with login credentials screen appearing first.
The credentials are:
username: admin
password: openstack
This should take to your Openstack console, where you can experiment with Openstack.
Debug:
If your Openstack web dashboard does not come up properly, check if your local port 8888 is not being blocked by your local firewall.
If the NAT IP obtained from dhclient was something other than 10.0.2.15, you can try this command and check if your Horizon web dashboard opens up from your PC after issuing this command:
[openstack@openstack ~]$ sudo ifconfig enp0s3 10.0.2.15 netmask 255.255.255.0
[openstack@openstack ~]$ sudo route add default gw 10.0.2.2 dev enp0s3
[openstack@openstack ~]$ sudo su
<Enter "openstack" password>
[openstack@openstack ~]# nameserver 8.8.8.8 >> /etc/resolv.conf
Try to open an ssh terminal from the host PC/Laptop's Putty or ssh client.
Use the command: ssh openstack@localhost -p 2222
If you cannot access the VM's ssh console, then the NAT Port Forwarding is not working properly.
Cheers trying out Openstack, the hassle-free way!
Let me know if you have improvements.
.


No comments:
Post a Comment